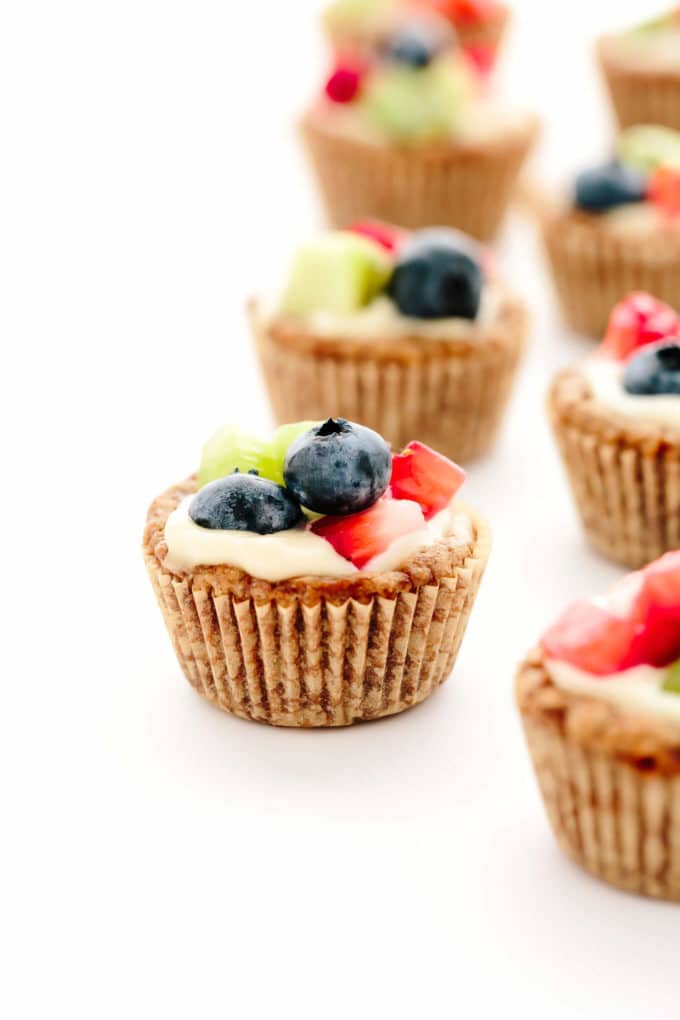
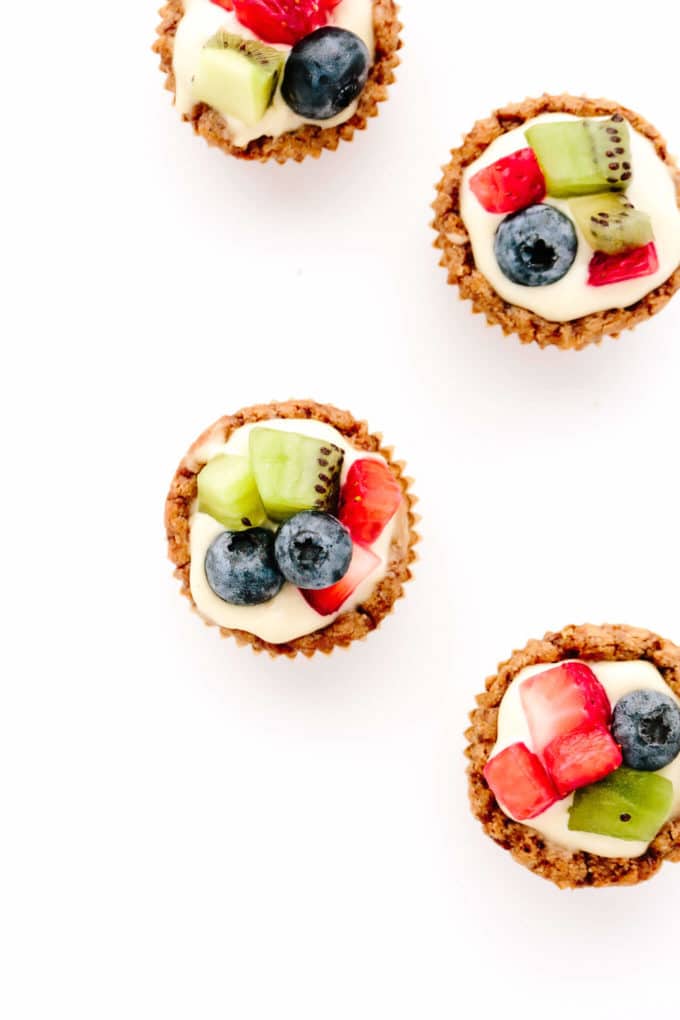
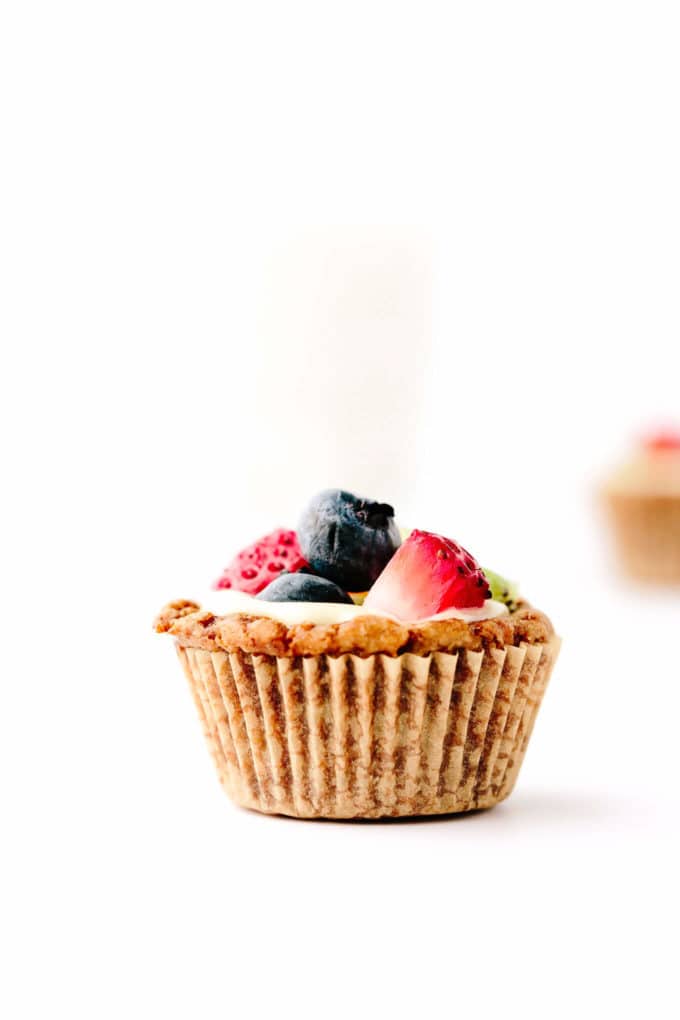
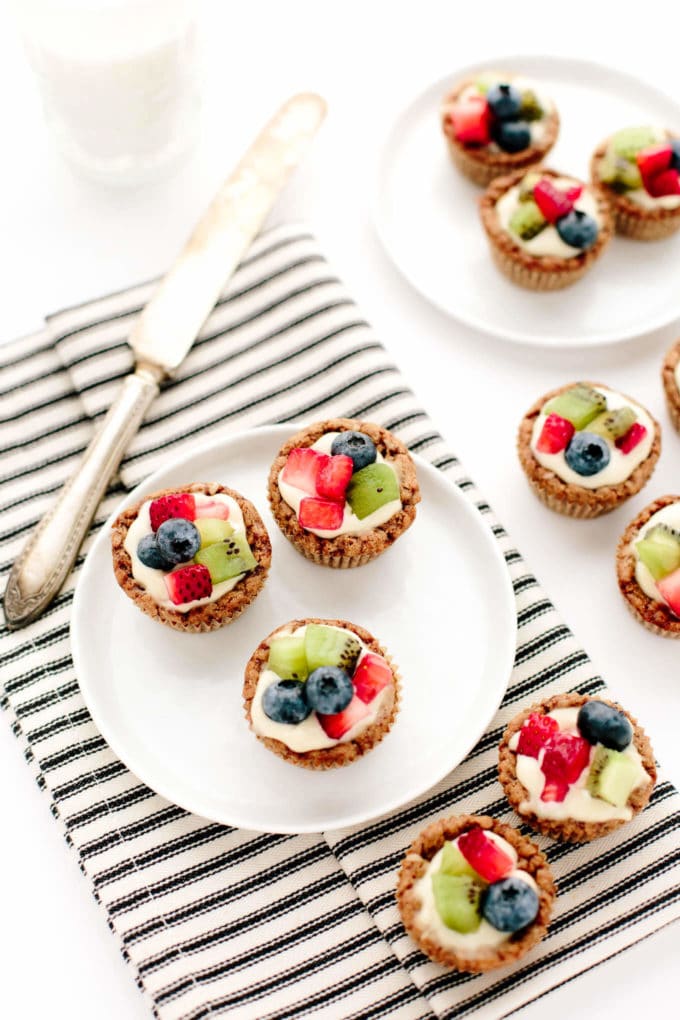
These vegan gluten-free mini fruit tarts are the perfect two-bite summer treat. Buttery cookie crust is stuffed with silky cashew cream cheese filling and fresh strawberries, kiwi, and blueberries. These mini tarts can be prepared up to two days ahead of time and are ideal for a summery get-together!
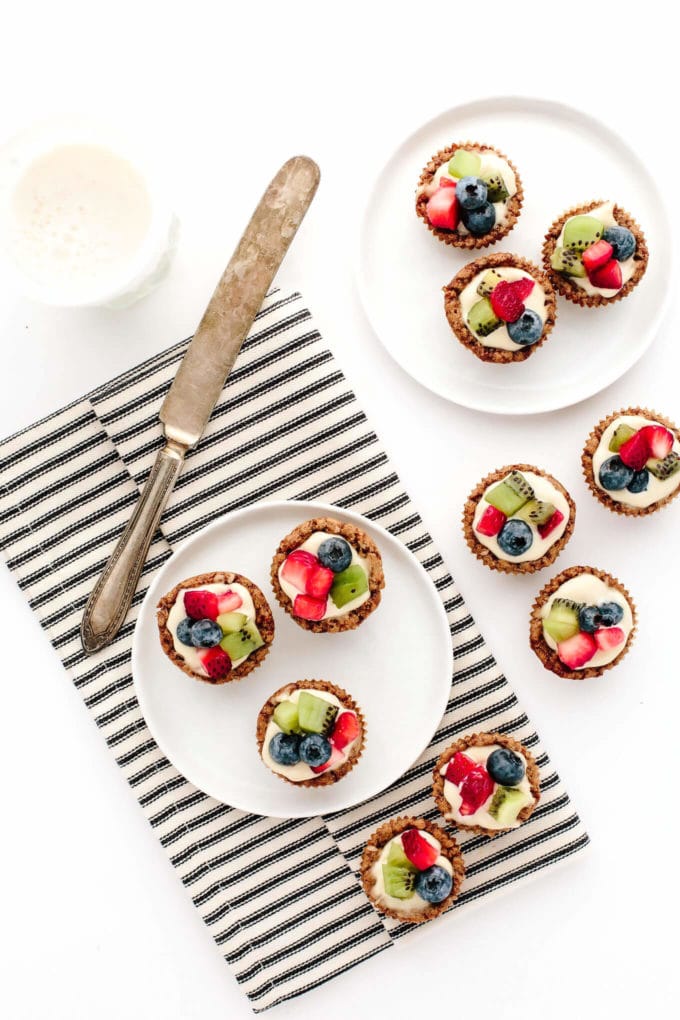
There's something heavenly about these two-bite tarts. Between their graham-cracker-like crust, rich cashew cream cheese filling, and bright fruit topping, they're a sweet summer force to be reckoned with.
Unlike larger tarts, their petite size makes these tiny treats an ideal dessert for two occasions in particular: 1) those nights when you just want a little something sweet to cap off a savory meal and 2) to serve a mobile and mingling crowd at a steamy summer gathering. They can even be prepared ahead of time for maximum crowd-pleasing ease.
To make these vegan gluten-free mini fruit tarts, you'll start by preparing the cashew cream cheese filling.
The filling is a play on the vanilla cashew-coconut icing from this recipe and this recipe and the vanilla cashew buttercream from this recipe, with the only difference being that the quantities of plant-based milk and apple cider vinegar are increased to create a denser, tangier filling.
To make it, you'll blend together homemade cashew cream, coconut butter, maple syrup, a tiny bit of coconut flour (to thicken and add structure), vanilla, a splash of apple cider vinegar (to offer a tang reminiscent of a traditional cream cheese frosting), and a pinch of sea salt.
Once it’s prepared, chill the filling in the freezer for 30 minutes to thicken it.
While the filling chills, you'll get to work on the tart crusts.
These buttery, graham-cracker-like crusts are a mini riff on the banoffee pie tart shells from my cookbook (page 253). They're incredibly easy to make and require a short list of ingredients that you're likely to have on hand if you're used to making my dessert recipes. Think: oat flour, coconut sugar, etc.
While the tart shells bake up, you'll get to work on slicing and dicing your fruit.
I like to use a simple combination of blueberries, diced strawberries, and diced kiwi, but please feel free to get creative. If you're more of a raspberry-blackberry-blueberry kind of person, go on with your berry-loving self.
Once all three elements—filling, crusts, fruit—are prepped and ready, it's time to assemble.
Simply spoon a bit of the cashew cream cheese filling into each crust and top with the fruit.

Alternatively, if you're preparing them ahead of time for a summer party or gathering, wait to assemble these beauts until the day that you're serving them.
Prepare the filling and tart crusts up to four days ahead of time and store each separately—the filling in the refrigerator and the crusts at room temperature.
Then, the day of, simply slice and dice some fresh fruit and assemble the tarts.
📖 Recipe

Vegan Gluten-Free Mini Fruit Tarts
Ingredients
Cashew Cream Cheese Filling
- ¾ cup raw cashews, soaked for at least 2 hours (preferably overnight) and drained
- ¾ cup unsweetened almond milk or other plant-based milk
- ½ cup melted coconut butter (it should be runny and pourable—see note*)
- ¼ cup pure maple syrup
- 1 ½ tablespoons apple cider vinegar (for a cream cheese like tang)
- 2 teaspoons coconut flour
- 2 teaspoons vanilla bean paste or pure vanilla extract
- ¼ teaspoon fine-grain sea salt
Mini Cookie Crusts
- 1 cup coconut sugar
- ¼ cup virgin coconut oil, at room temperature
- 1 teaspoon pure vanilla extract
- 1 ½ cups oat flour
- 1 ½ teaspoons aluminum-free baking powder
- ¼ teaspoon fine-grain sea salt
- 2 tablespoons filtered water
Toppings
- Strawberries, hulled and diced
- Blueberries
- 1 kiwi, peeled and diced
Instructions
For the Cashew Cream Cheese Filling
- Add the soaked cashews and almond milk to a high-speed blender, and blend on high until smooth, stopping to scrape down the sides as often as needed. The texture should resemble thick cream.
- Add the remaining icing ingredients and blend for 30 seconds, or until smooth, stopping to scrape down the sides as needed.
- Scoop the filling into a shallow bowl and chill in the freezer for at least 30 minutes (preferably 1 hour) to thicken, whisking every 10 minutes.
For the Mini Cookie Crusts
- Meanwhile, preheat the oven to 350F. Line a mini muffin tin with mini parchment paper baking cups.
- In a stand mixer fitted with the paddle attachment, beat together the coconut sugar, coconut oil, and vanilla on high speed for 1 minute.
- In a medium mixing bowl, whisk together the oat flour, baking powder, and sea salt. Place within reach of the mixer.
- With the mixer off, add the water to the coconut sugar mixture and start beating while slowly adding the oat flour mixture. Beat for 30 seconds, or until the dough pulls together into large, moist mounds as it moves around the mixing bowl. When you first add the dry ingredients, the dough will be dry and crumbly; however, just keep beating on high—the finished dough will look and feel similar to Play-Doh. If the dough is still dry and crumbly after beating for 30 seconds, add more filtered water, 1 tablespoon at a time, and continue beating until it pulls together.
- Scoop approximately 2 teaspoons of the dough into each baking cup, dividing any extra dough evenly among the 18 baking cups. Use your fingers to press the dough firmly and evenly into the bottom and 1 inch up the sides of each cup, forming a well.
- Bake for 8–12 minutes, or until the crusts are golden brown and a toothpick inserted into the center of one comes out mostly clean with a few moist crumbs at the tip. If you prefer a soft, chewy, cookielike crust, bake for 8–10 minutes; if you prefer a crisper crust, bake for 10–12 minutes. They'll puff up quite a bit while baking; however, they'll fall and settle back into crust shape as they cool. Also, don't worry if there is an oily sheen to the crusts when you first remove them from the oven; the oil will be reabsorbed as they cool.
- Transfer the pan to an oven-safe cooling rack. Cool completely.
To Assemble
- Spoon a bit of the cashew cream cheese filling into each cookie crust** and top with the fruit.
- Serve immediately or chill in the refrigerator to firm and thicken the filling. With a few more hours of chill time, the filling firms up to a thick, cream-cheese-like texture.
- Leftovers can be refrigerated for up to 2 days.***
Notes
Related Posts

 Berry Soft Serve & Vanilla Chia Pudding Parfait
 Cranberry & Pistachio Shortbread with Almond Icing
 Vegan Gluten-Free Peanut Butter Brownies with PB Glaze
 Vegan Vanilla Buttercream Chocolates
 Almost Raw Vegan Oatmeal Raisin Cookies with Vanilla Cashew Buttercream
 5-Minute Peanut Butter Chocolate Chip Cookie Dough


Ashley says
A couple of these sound perfect right about now! You're frosting/filling recipes are always spot-on!
Meriem @ Confessions of a Confectionista says
This is my kind of dessert! I've never tried soaking cashews and I feel like I'm truly missing out!
Celeste Jackson says
These look like the perfect sweet treat for a baby shower I'm hosting ;) Look forward to making these. Adorable!